
Print postcards
Guidelines
●
Use only cards that meet the specifications for the Auto Two-Sided Print Accessory
with Small Paper Tray. For more information, see the
Auto Two-Sided Print
Accessory with Small Paper Tray specifications
.
●
When printing a large number of cards, remove the printed material from the printer's
Out tray about halfway through the print job.
●
Do not exceed the maximum capacity for the rear tray: 100 cards.
Prepare to print
1.
Slide the paper-width guide to the left.
2.
Pull the paper lever forward and insert the cards.
The address side of the cards should face outward.
User's guide
167
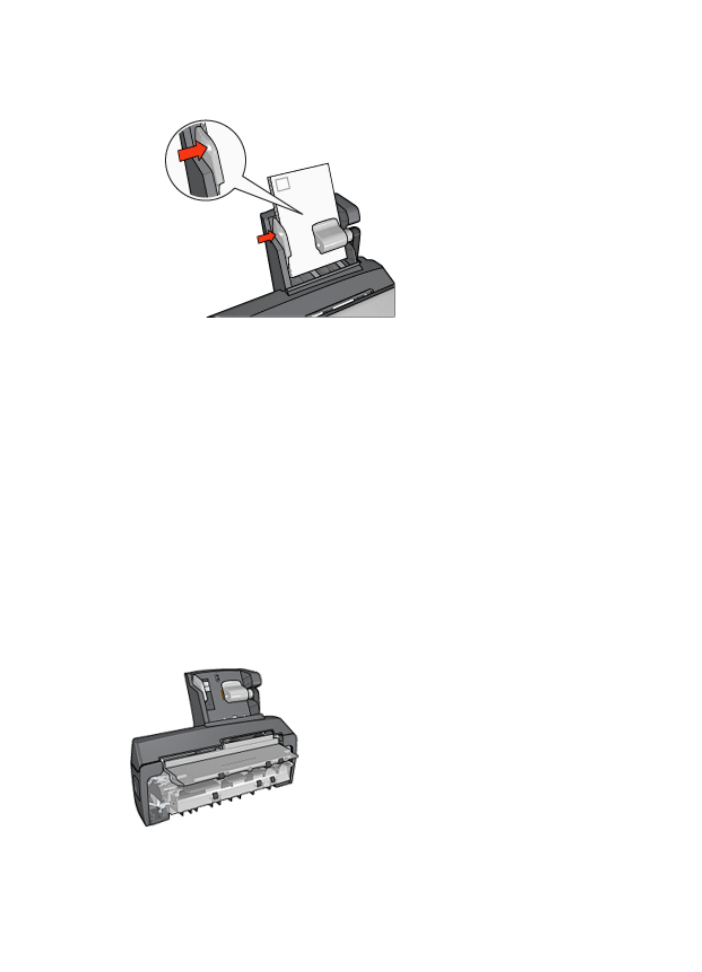
3.
Release the paper lever.
4.
Slide the paper-width guide against the edge of the cards.
1.
Open the
Printer Properties
dialog box.
2.
On the
Printing Shortcuts
tab, click
Postcard printing
, and then specify the
following print settings:
–
Paper Size
: The appropriate paper size
–
Paper Type
:
Plain paper
–
Paper Source
:
Rear tray
3.
Select any other print settings that you want, and then click
OK
.
Use the
What's This? help
to learn about the features that you see in the Printer
Properties dialog box.